Loading Data
Uploading Result Files
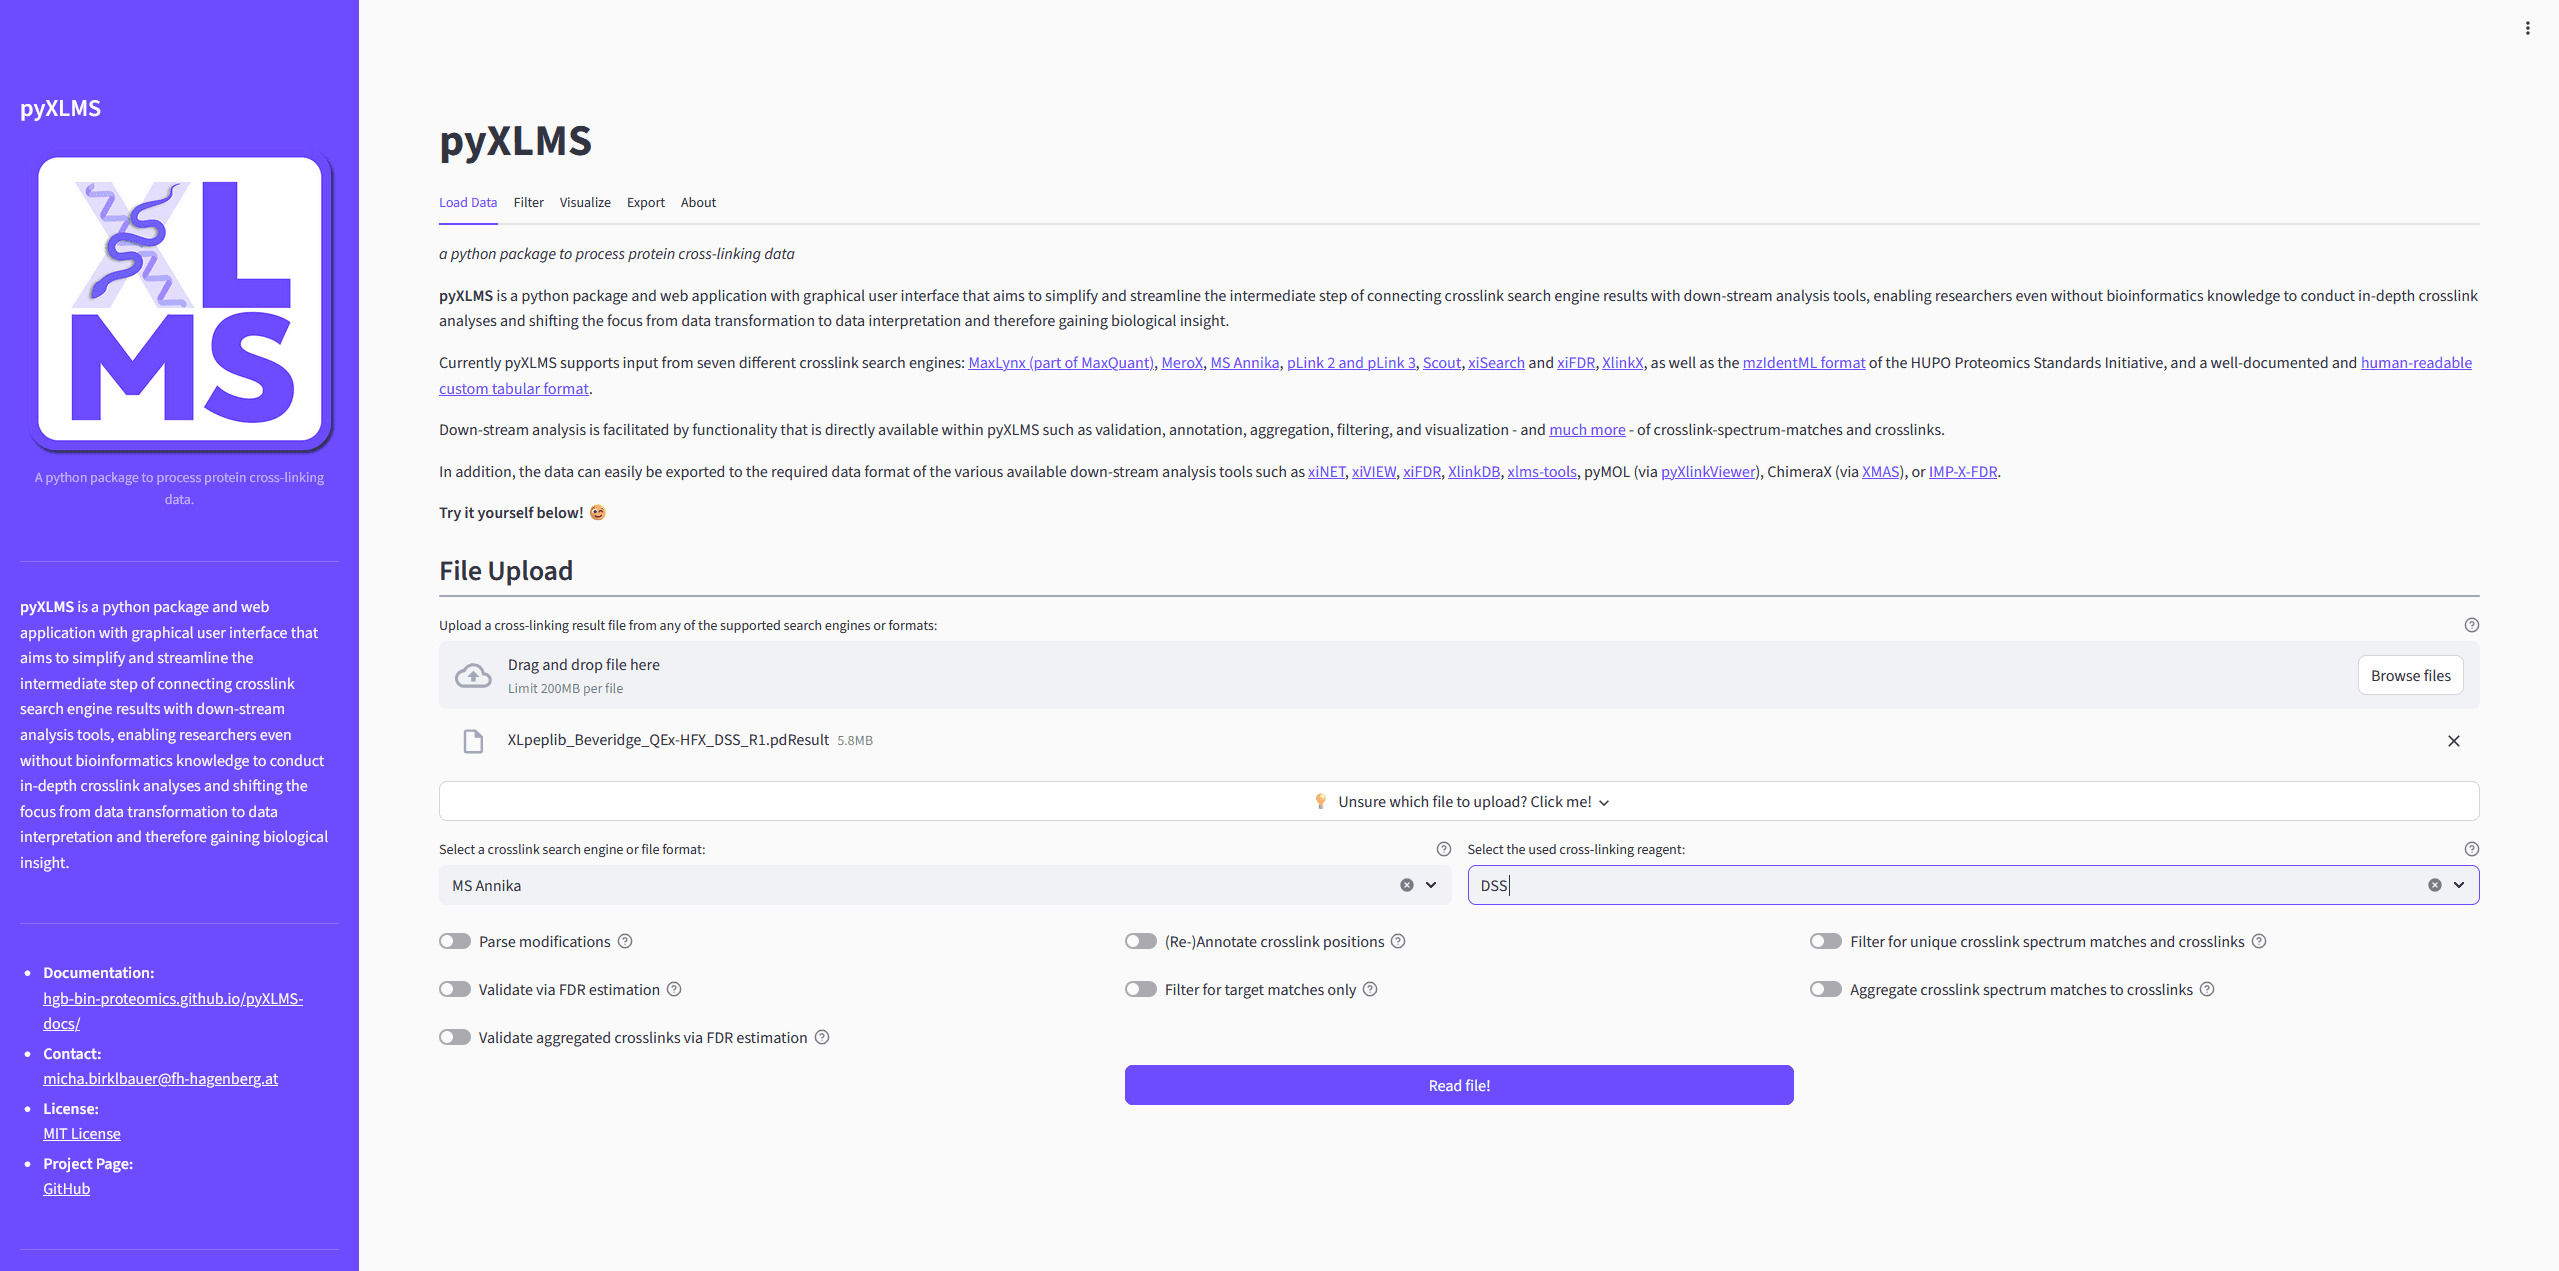
File Selection
The first step when using the pyXLMS web application is that you need to upload
one or more result files containing crosslink-spectrum-matches (CSMs) or crosslinks/residue
pairs (XLs) in the Load Data tab. You can find a list of supported crosslink search engines
and input formats
here .
We also provide some example files via the
pyXLMS GitHub repository
that you can try!
Starting from pyXLMS v1.6.1 the web application also supports input of multiple result files, e.g. if you have CSMs and XLs from the same run, result files of different fractions of your sample, or replicates.
Selecting Crosslink Search Engine or File Format
Next you need to select the correct crosslink search engine or file format from the dropdown menu. This should simply be the crosslink search engine that you used for crosslink identification with your mass spectrometry data, or a generic format like mzIdentML.
Selecting Crosslink Reagent
Then you need to select the crosslinking reagent that was used in your experiment
from the next dropdown menu. If your reagent is not in the list you can select
Custom and two additional input fields will pop up where you can specify a
crosslinker name and the monoisotopic delta mass of the crosslink modification.
Reading the Results
If you don’t want to employ any of the additional and optional pre-processing steps
(see next section) you can read your results now by clicking on the Read file(s)!
button!
[Optional] Pre-Processing Results
pyXLMS offers several different pre-processing steps as outlined below.
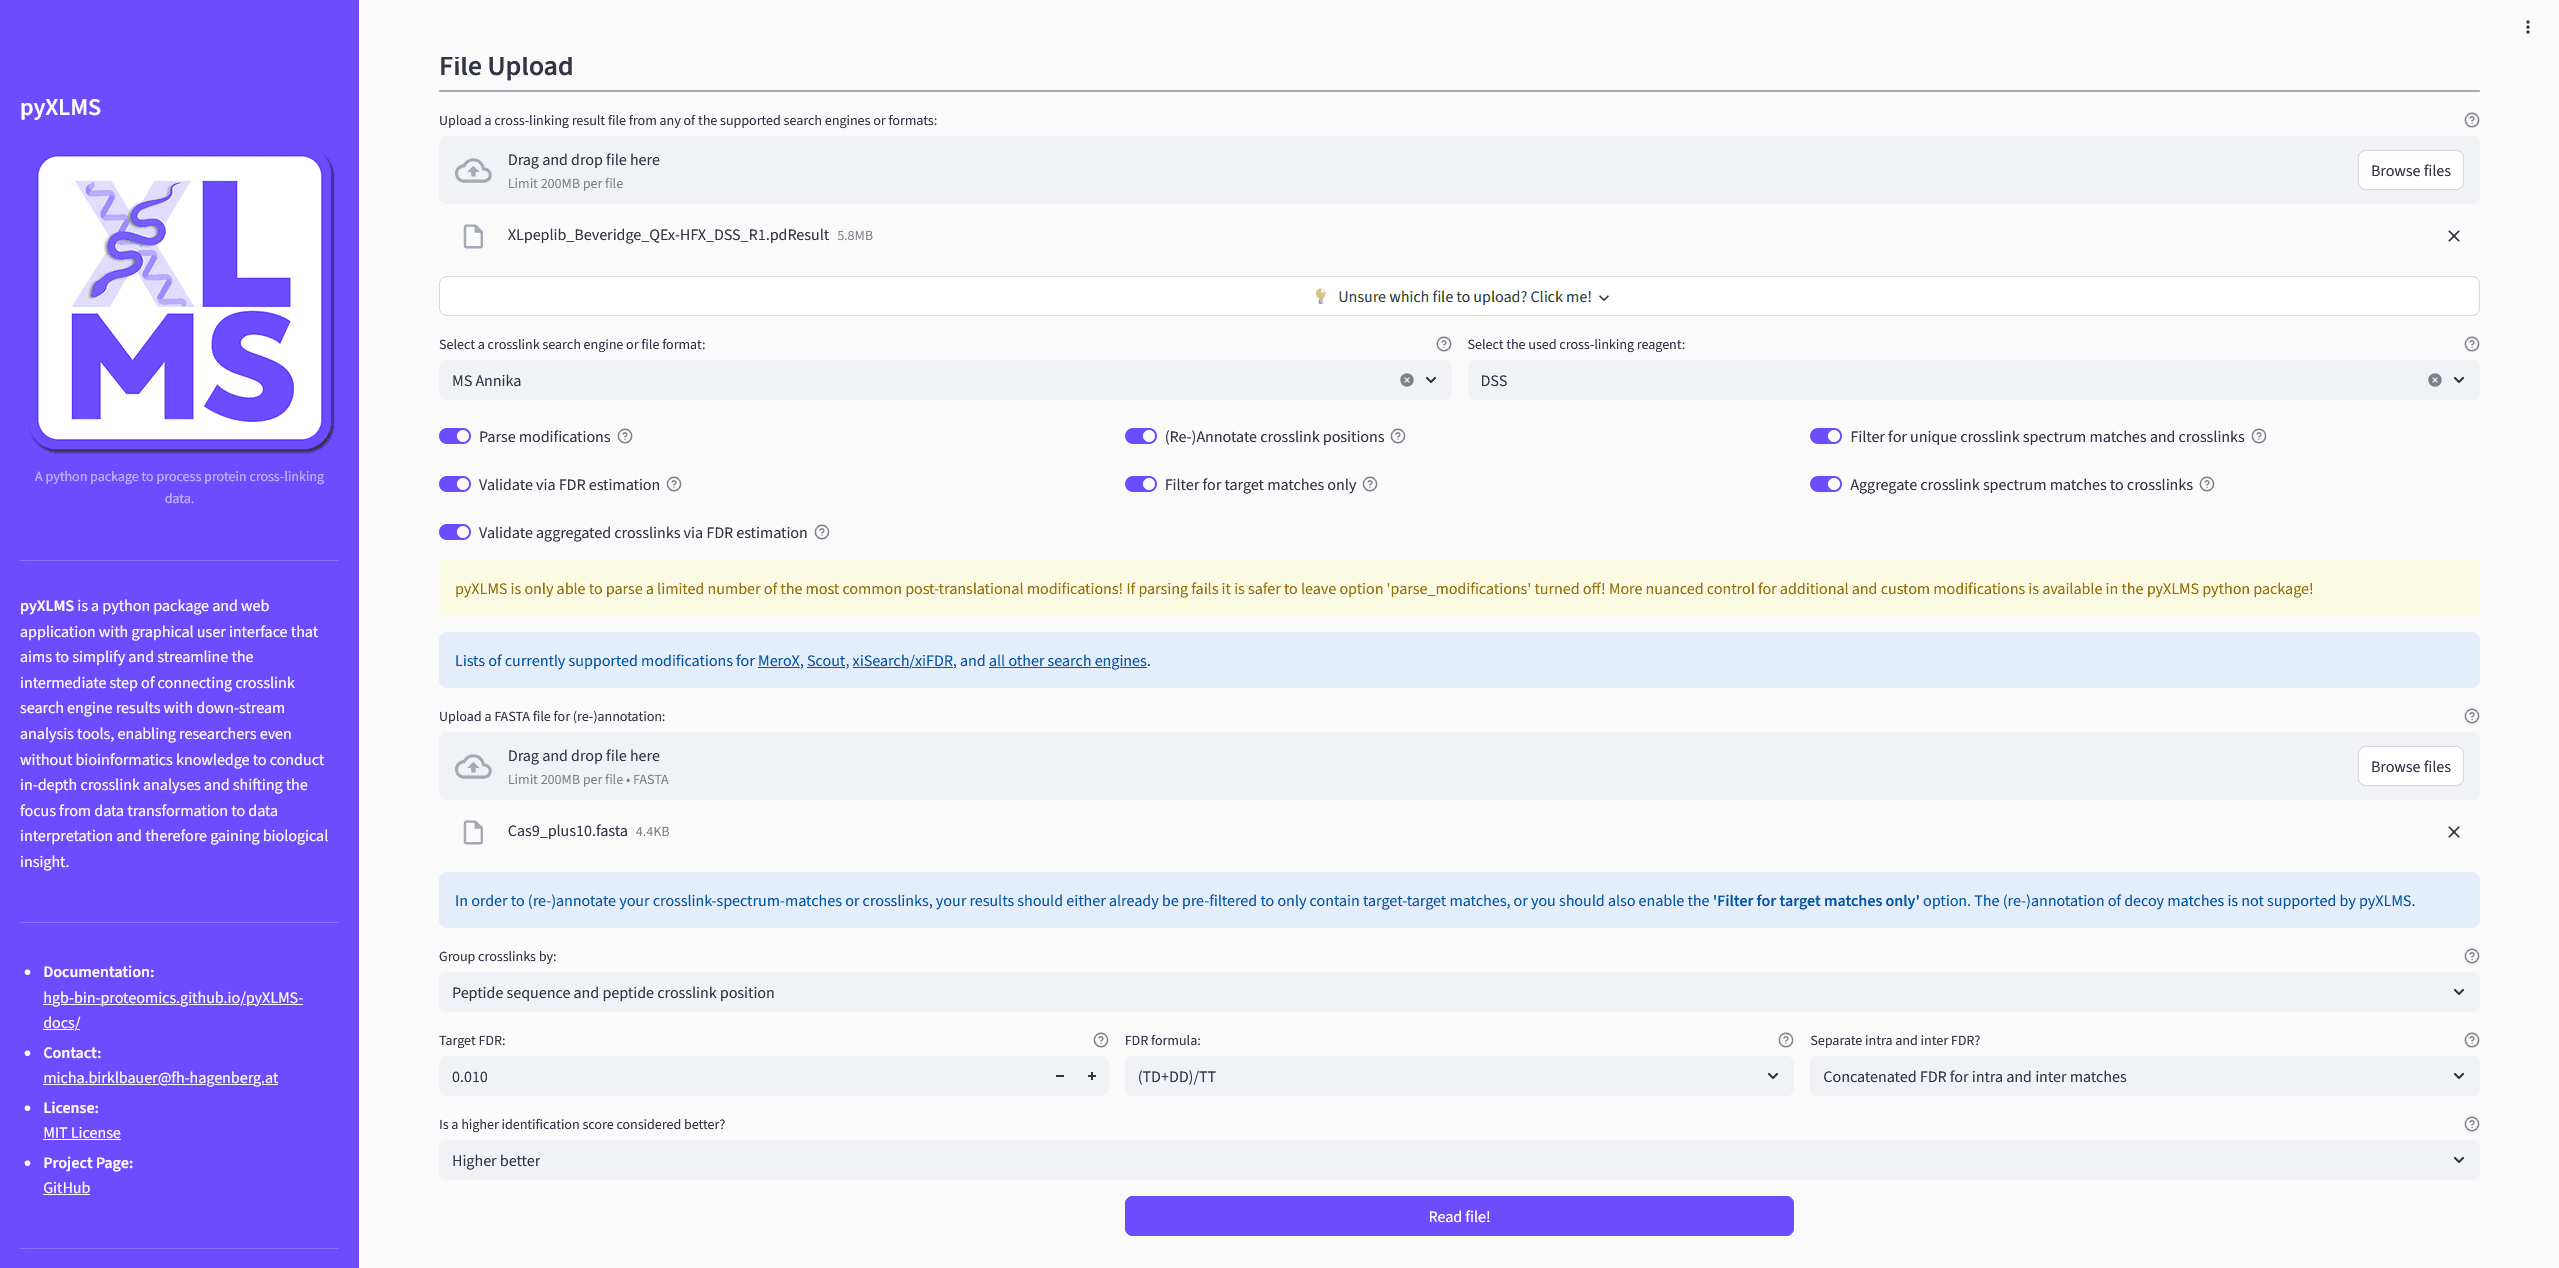
[Optionally] Apply One or More Pre-Processing Steps
-
Parse Modifications
Enabling this option will try to parse post-translation-modifications (PTMs) of your CSMs from your result files.
NotePlease note that the pyXLMS web app only supports a limited set of the most common PTMs! If parsing fails it is better to leave this option turned off and use the pyXLMS python package directly which gives a more nuanced control over modifications!
-
Re-Annotate Crosslink Positions
This option will allow you to upload a FASTA file to re-annotate the protein crosslink positions of your CSMs and XLs based on the given FASTA file. This might be useful if the annotation is missing because it was not given by the crosslink search engine, or if the crosslink search engine annotated something wrongly.
-
Filtering for Unique CSMs and XLs
If turned on this option will filter out any non-unique CSMs and XLs from your results. A crosslink is considered unique if its sequence and peptide crosslink positions are unique (option 1) or if its protein crosslink positions are unique (option 2) - these options are controlled via the
Group crosslinks byselector. -
Validation via FDR Estimation
Enabling this option will validate your results for a given target false-discover-rate (FDR) via FDR estimation and will only keep CSMs and XLs that fall within the target FDR.
ImportantWe recommend uploading results that are already validated in the crosslink search engine of your choice. Validation in pyXLMS uses a generic target-decoy approach with a single score that might not yield the same results as the search engine specific validation!
-
Filtering for Target Matches
If applied this option will filter out any CSMs and XLs that are not target-target matches.
-
Aggregation of CSMs to XLs
Whether or not your CSMs (if there are any) should be aggregated to XLs.
-
Validation of Aggregated XLs
Controls if your aggregated XLs from the previous pre-processing step should also be validated via FDR estimation. Shares the same settings as
Validation via FDR Estimation.
Reading the Results
You can read your results now by clicking on the Read file(s)! button!
Inspecting Your Results
Depending on the result file(s) you uploaded and the selected pre-processing steps you will see the read CSMs and/or XLs and/or aggregated XLs. The web app will both display the read data itself as well as a short summary statistic. You will also be able to directly download the data in different formats.
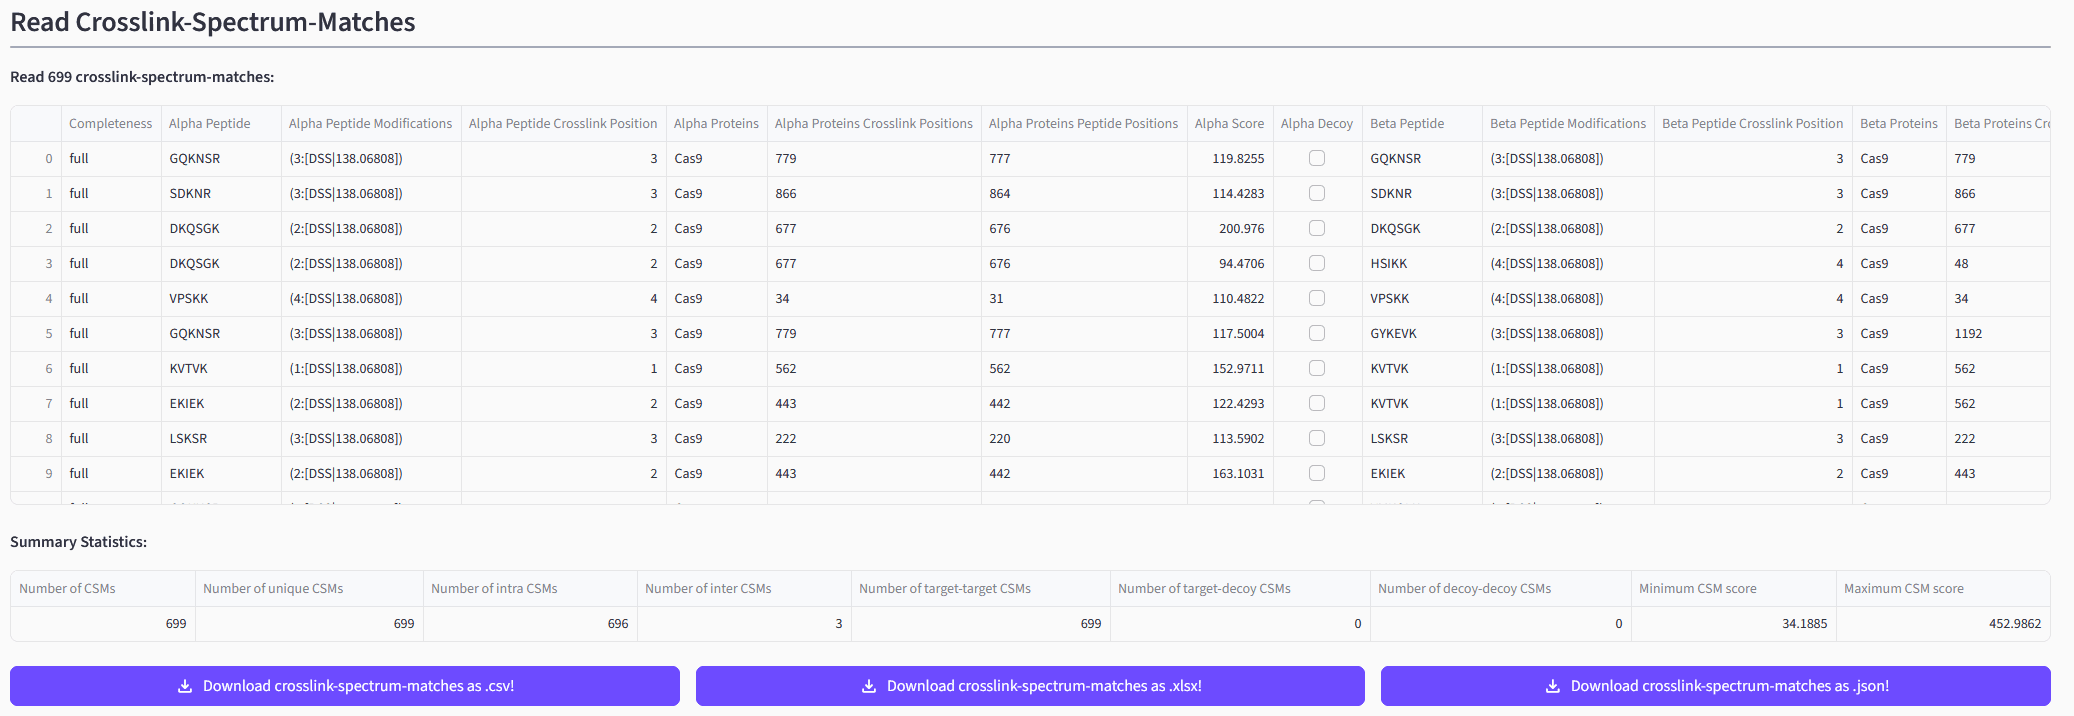
➡️ Exemplary depiction of read CSMs.
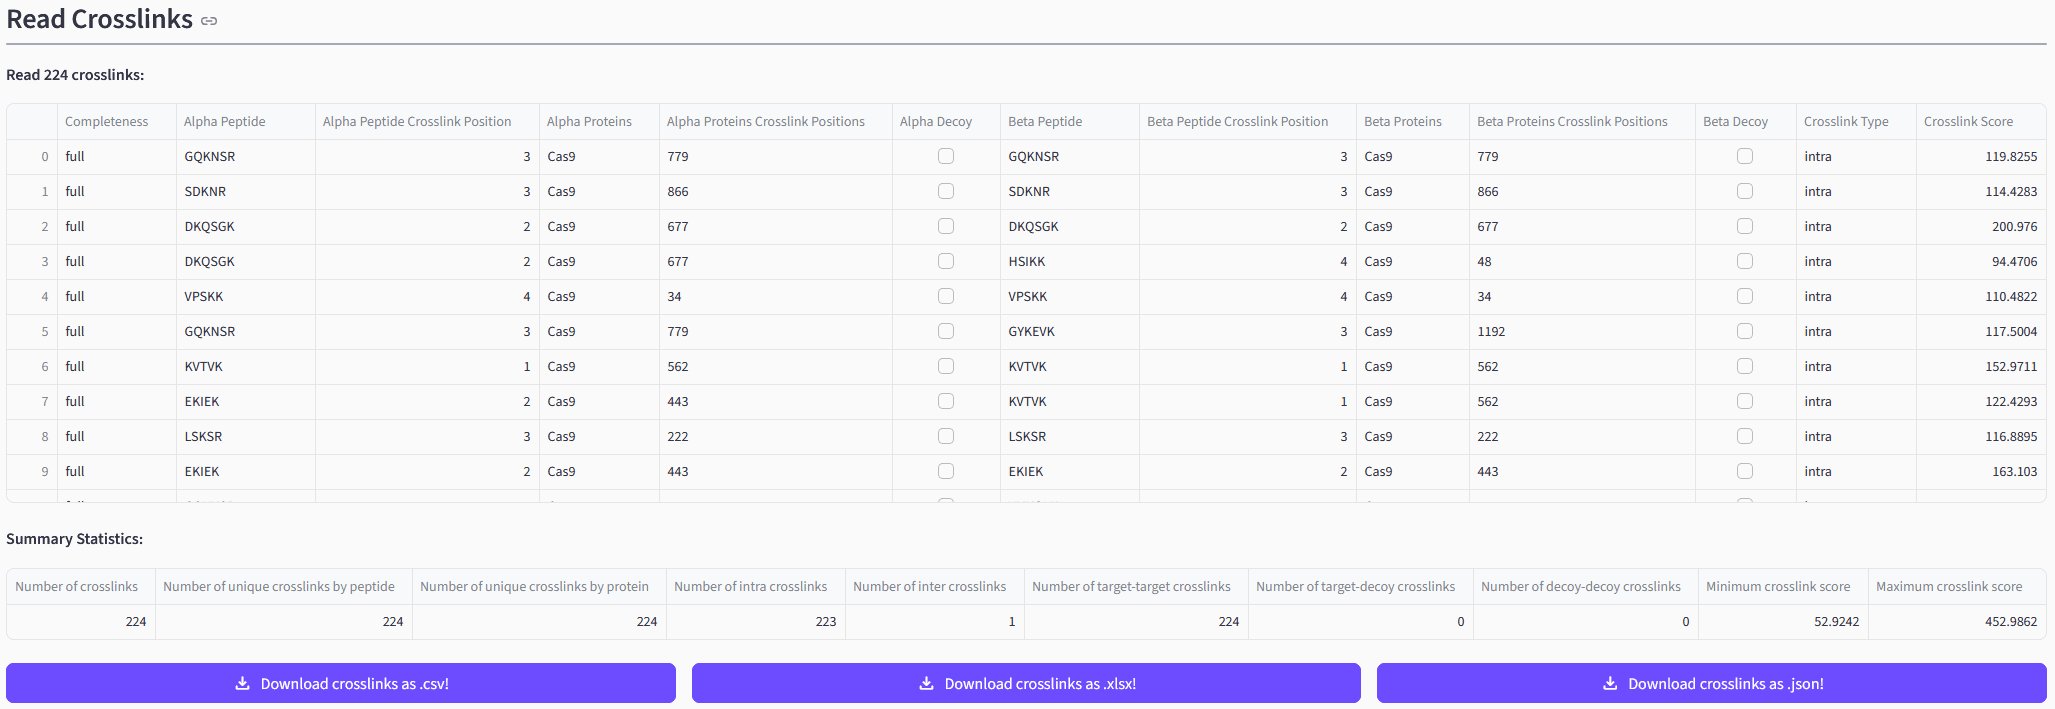
➡️ Exemplary depiction of read XLs.

➡️ Exemplary depiction of aggregated XLs created from the read CSMs.